I'm here! Hello Blog!
I have been so busy in my craft room for the past week I barely got to post anything.
Mostly, I have been organizing....
I started an inventory of my room and started to deal with my unmounted stamps.
Here is what I came up with.
First, you must all agree to not give me a hard time about the amount of supplies I have...
I take comfort knowing there are plenty of people with way way more stuff than me :)
Ok, now that we agree ;)
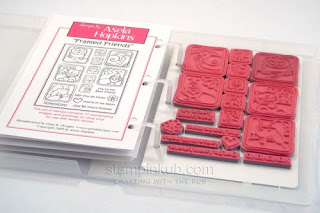
I should have taken a photo of the mess my unmounted stamps were before I started this organizational journey. Ugh!
Ok, so I have been researching my options for my unmounted stamps for a while. Basically, your choices are...
(in orange, the reason I didn't choose that type of storage)
1. CD cases (or DVD)
I started out with using CD cases and it's actually a really great storage solution. If,
1. You happen to have a lot of empty cd cases laying around and
2. if your good at putting new stamps in cases when you get them.
3. If you don't buy a lot of stamps.
Well, I didn't have cd cases laying around and I ended up having so many stamps... the stack of cd cases would have touched the ceiling and I would have been nominated for stamping hoarders :)
So this was a no go.
2. Binders with inserts (Storage Boards)
This too was a no go... I tried it, for my Unity stamps...
The stamps would always fall off the darn boards and I guess if you committed to storing them laying flat it might work. But I stored them in a binder on the shelf. = stamps everywhere.
3. CTMH or SU cases
I hadn't ever used these, but thought against them when I saw the price and the fact that they are as space consuming as cd/dvd cases.
4. Closeable Binders
Ok, so this is the most popular mode of storage these days. But, somehow I wasn't convinced. The last set of Binder boards didn't work and the only difference with these is the fact that the binder is a 'box'.
I just knew, with the way I use my stamps ... and sometimes the sticky isn't as sticky as it was on day 1.... pretty soon all the stamps would be at the bottom of the boxes.
What to do... What to do...
Off to Office Depot...
I spotted these little gems...
*** In the store they are like $3.00 rather than the $5.50 online price... I don't know why it's so different. I wouldn't have bought them for $5.50 YIKES!! ****
*** In the store they are like $3.00 rather than the $5.50 online price... I don't know why it's so different. I wouldn't have bought them for $5.50 YIKES!! ****
And I thought to myself, 'Nicole, those just might work'
I took a pack home and tried it out... and ...
Hot Dog! They do work~!
So step one was to get all my stamps into the bags. And make a box out of foam core to house the bags.
Box Measurements: 22 inches long 11 inches wide 4.5 inches tall
Zipper Measurements: 10 3/4 wide by about 6.5 tall
Basically, it fits perfect on my shelving unit and I can rummage through the little bags fast and easy. I'm liking it. A LOT!
Step 2 will be making sure each bag has a paper in front with the stamped images on it... so I can rummage through it fast looking for a stamp.
Step 3 will be beautifying the box and labeling the groupings of stamps by company and type.
So, stay tuned!


Wow; this looks like it would really be a great help in my mess of a craft room. I'll have to check it out this weekend. Thanks for sharing the idea.
ReplyDeleteThanks so much for sharing this idea! I feel the same way about the other forms of bulky storage solutions!
ReplyDelete